벡터 데이터베이스란? ( https://qdrant.tech/documentation/overview/ 참고 )

벡터 데이터베이스는 고차원 벡터를 효율적으로 저장하고 쿼리하도록 설계된 데이터베이스 유형입니다. 기존의 OLTP 및 OLAP 데이터베이스(위 이미지 참조)에서는 데이터가 행과 열로 구성되고(이를 테이블 이라고 함 ) 해당 열의 값을 기반으로 쿼리가 수행됩니다. 그러나 이미지 인식, 자연어 처리, 추천 시스템을 포함한 특정 애플리케이션에서는 데이터가 종종 고차원 공간의 벡터로 표현되고 이러한 벡터와 ID, 페이로드는 Qdrant와 같은 벡터 데이터베이스 내의 컬렉션이라는 항목에 저장하는 요소입니다.
이 맥락에서 벡터는 객체 또는 데이터 포인트의 수학적 표현이며, 벡터의 요소는 암묵적으로 또는 명시적으로 객체의 특정 기능 또는 속성에 해당합니다. 예를 들어, 이미지 인식 시스템에서 벡터는 이미지를 나타낼 수 있으며, 벡터의 각 요소는 픽셀 값 또는 해당 픽셀의 설명자/특성을 나타냅니다. 음악 추천 시스템에서 각 벡터는 노래를 나타낼 수 있으며, 벡터의 요소는 템포, 장르, 가사 등과 같은 노래의 특성을 포착합니다.
벡터 데이터베이스는 이러한 고차원 벡터를 효율적으로 저장 하고 쿼리하기 위해 최적화되었으며, 종종 Hierarchical Navigable Small World(HNSW)와 같은 특수 데이터 구조와 인덱싱 기술을 사용합니다. 이는 Approximate Nearest Neighbors를 구현하는 데 사용되며, Product Quantization 등이 있습니다. 이러한 데이터베이스는 빠른 유사성 및 의미 검색을 가능하게 하는 동시에 사용자가 일부 거리 메트릭을 기반으로 주어진 쿼리 벡터에 가장 가까운 벡터를 찾을 수 있도록 합니다. 가장 일반적으로 사용되는 거리 메트릭은 유클리드 거리, 코사인 유사성 및 내적 이며, 이 세 가지는 Qdrant에서 완벽하게 지원됩니다.
세 가지에 대한 간략한 개요는 다음과 같습니다.
- 코사인 유사도(Cosine Similarity) - 코사인 유사도는 두 벡터가 얼마나 유사한지 측정하는 방법입니다. 간단히 말해서, 벡터가 같은 방향(유사)을 가지고 있는지 또는 극적으로 떨어져 있는지를 반영합니다. 코사인 유사도는 종종 텍스트 표현과 함께 사용되어 두 문서 또는 문장이 서로 얼마나 유사한지 비교합니다. 코사인 유사도의 출력 범위는 -1에서 1까지이며, 여기서 -1은 두 벡터가 완전히 다르다는 것을 의미하고 1은 최대 유사도를 나타냅니다.
- 내적(Dot Product) - 내적 유사도 메트릭은 두 벡터가 얼마나 유사한지 측정하는 또 다른 방법입니다. 코사인 유사도와 달리 벡터의 길이도 고려합니다. 예를 들어, 문서의 벡터 표현이 용어(단어) 빈도에 따라 구축될 때 중요할 수 있습니다. 내적 유사도는 두 벡터의 각 값을 곱한 다음 해당 곱을 합하여 계산합니다. 합이 클수록 두 벡터가 더 유사합니다. 벡터를 정규화하면(그래서 벡터의 숫자가 합산되어 1이 됨) 내적 유사도가 코사인 유사도가 됩니다.
- 유클리드 거리(Euclidean Distance) - 유클리드 거리는 지도에서 두 장소 사이의 거리를 측정하는 방식과 비슷하게 공간의 두 지점 사이의 거리를 측정하는 방법입니다. 두 지점의 좌표 사이의 제곱 차이의 합의 제곱근을 구하여 계산합니다. 이 거리 메트릭은 기계 학습에서 두 벡터가 얼마나 유사하거나 다른지 측정하는 데도 일반적으로 사용됩니다.
이제 벡터 데이터베이스가 무엇이고 다른 데이터베이스와 구조적으로 어떻게 다른지 알았으니, 벡터 데이터베이스가 중요한 이유를 알아보겠습니다.
벡터 데이터베이스가 필요한 이유는 무엇입니까?
벡터 데이터베이스는 추천 시스템, 콘텐츠 기반 이미지 검색, 개인화된 검색과 같이 유사성 검색이 필요한 다양한 애플리케이션에서 중요한 역할을 합니다. 벡터 데이터베이스는 효율적인 인덱싱 및 검색 기술을 활용하여 이미 벡터로 표현된 비정형 데이터를 더 빠르고 정확하게 검색할 수 있게 하므로 사용자에게 쿼리에 가장 관련성 있는 결과를 제공하는 데 도움이 될 수 있습니다. 또한 벡터 데이터베이스를 사용하면 다음과 같은 다른 이점이 있습니다.
- 고차원 데이터의 효율적인 저장 및 인덱싱.
- 수십억 개의 데이터 포인트가 포함된 대규모 데이터 세트를 처리할 수 있는 능력.
- 실시간 분석 및 쿼리 지원.
- 이미지, 비디오, 자연어 텍스트 등 복잡한 데이터 유형에서 파생된 벡터를 처리하는 능력.
- 머신 러닝 및 AI 애플리케이션의 성능이 향상되고 지연 시간이 단축되었습니다.
- 맞춤형 솔루션을 구축하는 것에 비해 개발 및 배포에 걸리는 시간과 비용이 줄어듭니다.
벡터 데이터베이스를 사용하는 구체적인 이점은 조직의 사용 사례와 궁극적으로 선택하는 데이터베이스의 기능에 따라 달라질 수 있다는 점을 명심하세요. 이제 Qdrant가 어떻게 아키텍처화되었는지 개략적으로 평가해 보겠습니다.
Qdrant 아키텍처의 개략적 개요

위의 다이어그램은 Qdrant의 주요 구성 요소 중 일부에 대한 개략적인 개요를 나타냅니다. 익숙해져야 할 용어는 다음과 같습니다.
- 컬렉션(Collections) : 컬렉션은 검색할 수 있는 포인트(페이로드가 있는 벡터)의 명명된 집합입니다. 동일한 컬렉션 내의 각 포인트의 벡터는 동일한 차원을 가져야 하며 단일 메트릭으로 비교되어야 합니다.
- 명명된 벡터(Named Vector)는 단일 포인트에 여러 벡터를 갖는 데 사용할 수 있으며, 각각은 고유한 차원과 메트릭 요구 사항을 가질 수 있습니다.
- 거리 메트릭(Distance Metrics) : 벡터 간의 유사성을 측정하는 데 사용되며 컬렉션을 만들 때 동시에 선택해야 합니다. 메트릭 선택은 벡터를 얻은 방법, 특히 새 쿼리를 인코딩하는 데 사용될 신경망에 따라 달라집니다.
- 포인트(Point) : 포인트는 Qdrant가 운영하는 중심 엔터티이며 벡터와 선택적 ID 및 페이로드로 구성됩니다.
- id: 벡터의 고유 식별자입니다.
- 벡터: 이미지, 사운드, 문서, 비디오 등과 같은 데이터의 고차원 표현입니다.
- 페이로드 : 페이로드는 벡터에 추가할 수 있는 추가 데이터가 들어 있는 JSON 객체입니다.
- 저장 : Qdrant는 두 가지 저장 옵션 중 하나를 사용할 수 있습니다. 메모리 내 저장(모든 벡터를 RAM에 저장하고 디스크 액세스는 지속성을 위해서만 필요하므로 가장 빠른 속도를 가짐) 또는 Memmap 저장(디스크의 파일과 연관된 가상 주소 공간을 생성함)입니다.
- 클라이언트: Qdrant에 연결하는 데 사용할 수 있는 프로그래밍 언어입니다.
Docker 로 간단하게 설치( https://qdrant.tech/documentation/quickstart/ )할 수도 있지만 사전 조사 단계에서는 불필요해 보여 클라우드 상에서 프리 티어로 진행해 본다.
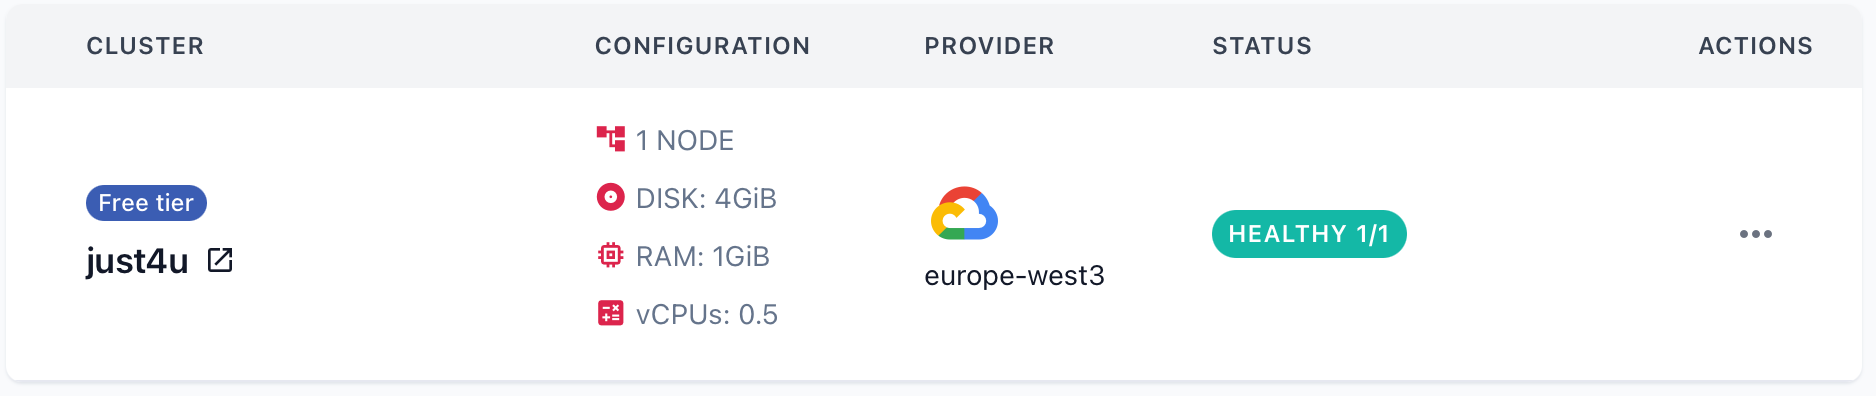
https://qdrant.tech 에서 Get Started 로 회원 가입 후 Free tier 생성.
기초 사용법

별도로 프로그램 설치나 개발 없이 웹에서 Dashboard를 활용하여 진행 할 수 있다.( https://qdrant.tech/documentation/web-ui/ )
Quickstart:
1. Vector Search for Beginners
Qdrant는 데이터 세트에서 대략 가장 가까운 데이터 포인트를 찾도록 설계되었습니다. 이 빠른 시작 가이드에서는 우주 식민지를 추적하고 벡터 표현을 기반으로 가장 가까운 식민지를 검색하는 간단한 데이터베이스를 만듭니다.
Step 1: Create a collection
먼저, 우리는 콜로니 데이터를 저장하기 위해 호출되는 컬렉션을 만들 것입니다 star_charts. 각 위치는 4차원 벡터로 표현되고, 우리는 유사성 검색을 위한 거리 메트릭으로 점곱을 사용할 것입니다. ( 개인적으로 점곱보다는 내적이라는 단어가 익숙하지만, 이후 편의성을 위해 번역 그대로 사용합니다. )
이 명령을 실행하여 컬렉션을 생성하세요.
PUT collections/star_charts
{
  "vectors": {
    "size": 4,
    "distance": "Dot"
  }
}
Step 2: Load data into the collection
이제 컬렉션이 설정되었으니 데이터를 추가해 보겠습니다. 각 위치에는 벡터와 이름과 같은 추가 정보(페이로드)가 있습니다. 데이터를 추가하려면 이 요청을 실행하세요.
PUT collections/star_charts/points
{
  "points": [
    {
      "id": 1,
      "vector": [0.05, 0.61, 0.76, 0.74],
      "payload": {
        "colony": "Mars"
      }
    },
    {
      "id": 2,
      "vector": [0.19, 0.81, 0.75, 0.11],
      "payload": {
        "colony": "Jupiter"
      }
    },
    {
      "id": 3,
      "vector": [0.36, 0.55, 0.47, 0.94],
      "payload": {
        "colony": "Venus"
      }
    },
    {
      "id": 4,
      "vector": [0.18, 0.01, 0.85, 0.80],
      "payload": {
        "colony": "Moon"
      }
    },
    {
      "id": 5,
      "vector": [0.24, 0.18, 0.22, 0.44],
      "payload": {
        "colony": "Pluto"
      }
    }
  ]
}
Step 3: Run a search query
이제 공간적 위치를 나타내는 특정 벡터에 가장 가까운 세 개의 콜로니를 검색해 보겠습니다. 이 쿼리는 콜로니와 해당 페이로드 정보를 반환합니다.
가장 가까운 식민지를 찾으려면 아래 쿼리를 실행하세요.
POST collections/star_charts/points/search
{
  "vector": [0.2, 0.1, 0.9, 0.7],
  "limit": 3,
  "with_payload": true
}
Result
{
  "result": [
    {
      "id": 4,
      "version": 0,
      "score": 1.362,
      "payload": {
        "colony": "Moon"
      }
    },
    {
      "id": 1,
      "version": 0,
      "score": 1.273,
      "payload": {
        "colony": "Mars"
      }
    },
    {
      "id": 3,
      "version": 0,
      "score": 1.208,
      "payload": {
        "colony": "Venus"
      }
    }
  ],
  "status": "ok",
  "time": 0.002277767
}
공간 데이터를 컬렉션에 성공적으로 추가하고 벡터 표현을 기반으로 가장 가까운 위치를 찾기 위한 검색을 수행했습니다. 다음 섹션에서는 행성간 탐사에 대한 검색을 더욱 세분화하기 위해 복잡한 필터 조건을 만드는 방법을 알아보겠습니다!
2. Load Data into a Collection from a Remote Snapshot
원격 스냅샷에서 Qdrant 컬렉션으로 데이터를 로드하는 방법을 안내합니다.
Step 1: Import a snapshot to a collection
시작하려면 컬렉션을 만들고 midjourney벡터 데이터를 로드합니다. 컬렉션은 스냅샷의 매개변수를 사용하고 벡터 크기는 512이며 유사성은 코사인 거리를 사용하여 측정됩니다.
PUT /collections/midjourney/snapshots/recover
{
  "location": "http://snapshots.qdrant.io/midlib.snapshot"
}
스냅샷의 벡터가 컬렉션에 추가될 때까지 잠시 기다리세요.
Step 2: Verify the data upload
데이터를 가져온 후에는 데이터가 성공적으로 업로드되었는지 확인하는 것이 중요합니다. 컬렉션의 벡터(또는 포인트) 수를 확인하여 이를 수행할 수 있습니다.
다음 요청을 실행하여 벡터 개수를 가져옵니다.
POST /collections/midjourney/points/count
The collection should contain 5,417 data points.
Step 3: Open the collection UI
업로드된 데이터는 아래와 같이 대시보드의 Collections 에서도 확인 할 수 있다.

추가저긍로 해당 Collection의 정보를 확인하기 위해 (예, 위에 벡터크기, 유사도 값) Console에서 다음 명령어를 입력한다.
GET /collections/midjourney

Then.

{
  "result": {
    "status": "green",
    "optimizer_status": "ok",
    "indexed_vectors_count": 5417,
    "points_count": 5417,
    "segments_count": 2,
    "config": {
      "params": {
        "vectors": {
          "size": 512,
          "distance": "Cosine"
        },
        "shard_number": 1,
        "replication_factor": 1,
        "write_consistency_factor": 1,
        "on_disk_payload": true
      },
      "hnsw_config": {
        "m": 16,
        "ef_construct": 100,
        "full_scan_threshold": 10000,
        "max_indexing_threads": 0,
        "on_disk": false
      },
      "optimizer_config": {
        "deleted_threshold": 0.2,
        "vacuum_min_vector_number": 1000,
        "default_segment_number": 2,
        "max_segment_size": null,
        "memmap_threshold": null,
        "indexing_threshold": 1000,
        "flush_interval_sec": 5,
        "max_optimization_threads": null
      },
      "wal_config": {
        "wal_capacity_mb": 1,
        "wal_segments_ahead": 0
      },
      "quantization_config": null,
      "strict_mode_config": {
        "enabled": false
      }
    },
    "payload_schema": {}
  },
  "status": "ok",
  "time": 0.000111448
}
3. Basic Filtering - Clauses and Conditions
Step 1: Create a Collection
First, create a collection called terraforming. Each point will have vectors of size 4, and the distance metric is set to Dot:
PUT collections/terraforming
{
  "vectors": {
    "size": 4,
    "distance": "Dot"
  }
}
PUT collections/terraforming
{
  "vectors": {
    "size": 4,
    "distance": "Dot"
  }
}
Step 2: Add Points with Vectors and Payloads
Now, add points to the collection. Each point includes an id, vector and a payload with various attributes like land type, color, life presence, and humidity:
PUT collections/terraforming/points
{
  "points": [
    {
      "id": 1,
      "vector": [0.1, 0.2, 0.3, 0.4],
      "payload": {"land": "forest", "color": "green", "life": true, "humidity": 40}
    },
    {
      "id": 2,
      "vector": [0.2, 0.3, 0.4, 0.5],
      "payload": {"land": "lake", "color": "blue", "life": true, "humidity": 100}
    },
    {
      "id": 3,
      "vector": [0.3, 0.4, 0.5, 0.6],
      "payload": {"land": "steppe", "color": "green", "life": false, "humidity": 25}
    },
    {
      "id": 4,
      "vector": [0.4, 0.5, 0.6, 0.7],
      "payload": {"land": "desert", "color": "red", "life": false, "humidity": 5}
    },
    {
      "id": 5,
      "vector": [0.5, 0.6, 0.7, 0.8],
      "payload": {"land": "marsh", "color": "black", "life": true, "humidity": 90}
    },
    {
      "id": 6,
      "vector": [0.6, 0.7, 0.8, 0.9],
      "payload": {"land": "cavern", "color": "black", "life": false, "humidity": 15}
    }
  ]
}
Step 3: Filtering examples
Filter by exact match ( = 쿼리 )
Finally, this query retrieves points where the color is "black", using a straightforward match condition:
POST collections/terraforming/points/scroll
{
  "filter": {
    "must": [
      {
        "key": "color",
        "match": {
          "value": "black"
        }
      }
    ]
  },
  "limit": 3,
  "with_payload": true
}
Combined filter by must clause ( AND )
In this example, the query returns points where life is true and color is "green". These must conditions both need to be met for a point to be returned.
POST collections/terraforming/points/scroll
{
  "filter": {
    "must": [
      { "key": "life", "match": { "value": true } },
      { "key": "color", "match": { "value": "green" } }
    ]
  },
  "limit": 3,
  "with_payload": true
}
Filter by should clause ( OR )
Here, you are filtering for points where life is false and color is "black". These conditions act as should clauses, meaning points meeting either or both criteria will be returned:
POST collections/terraforming/points/scroll
{
  "filter": {
    "should": [
      {
        "key": "life",
        "match": { "value": false }
      }, {
        "key": "color",
        "match": { "value": "black" }
      }
    ]
  }
}
Filter by must_not clause ( != )
This query filters out any points where life is false. Points matching this condition are excluded from the results.
POST collections/terraforming/points/scroll
{
  "filter": {
    "must_not": [
      {
       "key": "life",
       "match": { "value": false }
      }
    ]
  },
  "limit": 3,
  "with_payload": true
}
Filter by range condition ( between a and b )
This query filters points based on a range of humidity. Here, the humidity value must be exactly 40:
POST collections/terraforming/points/scroll
{
  "filter": {
    "must": [
      {
       "key": "humidity",
       "range": {
         "gte": 40,
         "lte": 40
       }
      }
    ]
  },
  "limit": 3,
  "with_payload": true
}
4. Advanced Filtering - Nested Filters
Step 1: Create a Collection
Start by creating a collection named dinosaurs with a vector size of 4 and the distance metric set to Dot:
PUT collections/dinosaurs
{
  "vectors": {
    "size": 4,
    "distance": "Dot"
  }
}
Step 2: Add Vectors with Payloads
You can now add points to the collection. Each point contains an id, vector and a payload with additional information such as the dinosaur species and diet preferences. For example:
PUT collections/dinosaurs/points
{
  "points": [
    {
      "id": 1,
      "vector": [0.1, 0.2, 0.3, 0.4],
      "payload": {
        "dinosaur": "t-rex",
        "diet": [
          { "food": "leaves", "likes": false },
          { "food": "meat", "likes": true }
        ]
      }
    },
    {
      "id": 2,
      "vector": [0.2, 0.3, 0.4, 0.5],
      "payload": {
        "dinosaur": "diplodocus",
        "diet": [
          { "food": "leaves", "likes": true },
          { "food": "meat", "likes": false }
        ]
      }
    }
  ]
}
Step 3: Basic Filtering with match
You can filter points by specific payload values. For instance, the query below matches points where:
- The diet[].food contains "meat".
- The diet[].likes is set to true.
Both points match these conditions, as:
- The “t-rex” eats meat and likes it.
- The “diplodocus” eats meat but doesn't like it.
POST /collections/dinosaurs/points/scroll
{
  "filter": {
    "must": [
      {
        "key": "diet[].food",
        "match": {
          "value": "meat"
        }
      },
      {
        "key": "diet[].likes",
        "match": {
          "value": true
        }
      }
    ]
  }
}
However, if you want to retrieve only the points where both conditions are true for the same element within the array (e.g., the "t-rex" with ID 1), you'll need to use a nested filter.
Step 4: Advanced Filtering with Nested Object Filters
To apply the filter at the array element level, you use the nested filter condition. This ensures that the food and likes values are evaluated together within each array element:
POST /collections/dinosaurs/points/scroll
{
  "filter": {
    "must": [
      {
        "nested": {
          "key": "diet",
          "filter": {
            "must": [
              {
                "key": "food",
                "match": {
                  "value": "meat"
                }
              },
              {
                "key": "likes",
                "match": {
                  "value": true
                }
              }
            ]
          }
        }
      }
    ]
  }
}
With this filter, only the "t-rex" (ID 1) is returned, because its array element satisfies both conditions.
Explanation
Nested filters treat each array element as a separate object, applying the filter independently to each element. The parent document (in this case, the dinosaur point) matches the filter if any one array element meets all conditions.
Step 5: Combining has_id with Nested Filters
Note that has_id cannot be used inside a nested filter. If you need to filter by ID as well, include the has_id condition as a separate clause, like this:
You won't get a different answer. You can see that this filter matches the "t-rex" (ID 1) by combining the nested diet filter with an explicit ID match.
POST /collections/dinosaurs/points/scroll
{
  "filter": {
    "must": [
      {
        "nested": {
          "key": "diet",
          "filter": {
            "must": [
              {
                "key": "food",
                "match": {
                  "value": "meat"
                }
              },
              {
                "key": "likes",
                "match": {
                  "value": true
                }
              }
            ]
          }
        }
      },
      {
        "has_id": [1]
      }
    ]
  }
}
Result:
{
  "result": {
    "points": [
      {
        "id": 1,
        "payload": {
          "dinosaur": "t-rex",
          "diet": [
            {
              "food": "leaves",
              "likes": false
            },
            {
              "food": "meat",
              "likes": true
            }
          ]
        }
      }
    ],
    "next_page_offset": null
  },
  "status": "ok",
  "time": 0.000307435
}
5. Full Text Filtering
Here's a step-by-step tutorial on Full Text Filtering in Qdrant using a collection of planetary data with description fields:
Step 1: Create a collection
We first create a collection named star_charts with vectors of size 4 and dot product distance for similarity.
PUT /collections/star_charts
{
  "vectors": {
    "size": 4,
    "distance": "Dot"
  }
}
Step 2: Add data with descriptions in payload
Next, we add data to the collection. Each entry includes an id, vector and a payload containing details about various celestial bodies, such as colony information, whether the body supports life and a description.
PUT collections/star_charts/points
{
  "points": [
    {
      "id": 1,
      "vector": [0.05, 0.61, 0.76, 0.74],
      "payload": {
        "colony": "Mars",
        "supports_life": true,
        "description": "The red planet, Mars, has a cold desert climate and may have once had conditions suitable for life."
      }
    },
    {
      "id": 2,
      "vector": [0.19, 0.81, 0.75, 0.11],
      "payload": {
        "colony": "Jupiter",
        "supports_life": false,
        "description": "Jupiter is the largest planet in the solar system, known for its Great Red Spot and hostile gas environment."
      }
    },
    {
      "id": 3,
      "vector": [0.36, 0.55, 0.47, 0.94],
      "payload": {
        "colony": "Venus",
        "supports_life": false,
        "description": "Venus, Earth’s twin in size, has an extremely thick atmosphere and surface temperatures hot enough to melt lead."
      }
    },
    {
      "id": 4,
      "vector": [0.18, 0.01, 0.85, 0.80],
      "payload": {
        "colony": "Moon",
        "supports_life": true,
        "description": "Earth’s Moon, long visited by astronauts, is a barren, airless world but could host colonies in its underground caves."
      }
    },
    {
      "id": 5,
      "vector": [0.24, 0.18, 0.22, 0.44],
      "payload": {
        "colony": "Pluto",
        "supports_life": false,
        "description": "Once considered the ninth planet, Pluto is a small icy world at the edge of the solar system."
      }
    }
  ]
}
Step 3: Try filtering with exact phrase (substring match)
Now, let's try to filter the descriptions to find entries that contain the exact phrase "host colonies." Qdrant supports text filtering by default using exact matches, but note that this will not tokenize the text.
POST /collections/star_charts/points/scroll
{
  "filter": {
    "must": [
      {
        "key": "description",
        "match": {
          "text": "host colonies"
        }
      }
    ]
  },
  "limit": 2,
  "with_payload": true
}
You’ll notice this filter works, but if you change the phrase slightly, it won’t return results, since substring matching in unindexed text isn’t flexible enough for variations.
Step 4: Index the description field
To make filtering more powerful and flexible, we’ll index the description field. This will tokenize the text, allowing for more complex queries such as filtering for phrases like "cave colonies." We use a word tokenizer, and only tokens that are between 5 and 20 characters will be indexed.
Note: You should always index a field before filtering. If you use filtering before you create an index (like in Step 3), Qdrant will search through the entire dataset in an unstructured way. Your search performance will be very slow.
PUT /collections/star_charts/index
{
    "field_name": "description",
    "field_schema": {
        "type": "text",
        "tokenizer": "word",
        "lowercase": true
    }
}
Step 5: Try the filter again
After indexing, you can now run the filter again, but this time not searching for a phrase. Now you will filter for all tokens "cave" AND "colonies" from the descriptions.
POST /collections/star_charts/points/scroll
{
  "filter": {
    "must": [
      {
        "key": "description",
        "match": {
          "text": "cave colonies"
        }
      }
    ]
  },
  "limit": 2,
  "with_payload": true
}
Summary
Phrase search requires tokens to come in and exact sequence, and by indexing all words we are ignoring the sequence completely and filtering for relevant keywords.
Essentials
Data Ingestion for Beginners
Simple Agentic RAG System
Agentic RAG With LangGraph
Agentic RAG Discord Bot with CAMEL-AI
Multilingual & Multimodal RAG with LlamaIndex
5 Minute RAG with Qdrant and DeepSeek
튜토리얼
- Semantic Search 101
- Build a Neural Search Service
- Setup Hybrid Search with FastEmbed
- Measure Search Quality
- Search Through Your Codebase
- Build a Recommendation System with Collaborative Filtering
- Scaling PDF Retrieval with Qdrant
- Bulk Upload Vectors
- Create & Restore Snapshots
- Load a HuggingFace Dataset
- Build With Async API
- Automate filtering with LLMs
Examples
- Documentation
- Build Prototypes
'AI' 카테고리의 다른 글
| 2025년 AI 에이전트 비즈니스 (0) | 2025.03.25 |
|---|---|
| CrewAI - Multi-Agent AI Platform (0) | 2025.03.24 |
| 구글 검색 키워드로 알아보는 AI 트렌드 분석 (0) | 2025.03.23 |
| 딥 리서치 서비스들( Deep Rearch ) (1) | 2025.03.23 |
| Genspark Plus 멤버쉽 한 달 동안 무료로 사용하세요. (0) | 2025.03.21 |


댓글